Quick Start
Installation & Setup
On most sytems installing Joystick Gremlin only requires the installation of vJoy and Joystick Gremlin itself. Once vJoy is installed it is advisable to configure the vJoy device(s), using vJoyConf, to contain the desired number of axes, buttons, and hats.
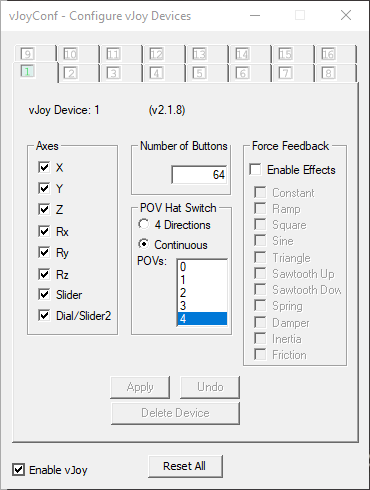
VJoy configuration dialog with settings required for proper Joystick Gremlin operation.
Using a vJoy variant other than the one linked here has the potential to be non-functional.
When configuring the hat instances make sure to select continuous for their type.
When configuring multiple vJoy devices, make sure they differ at least in one of the number of axes, buttons, or hats. If this is not the case Gremlin cannot correctly map from vJoy device identifiers to DirectInput device identifiers and will fail to start.
How Gremlin Works
The following is intended as a simple guide that introduces the concepts used in Joystick Gremlin by way of examples of how common tasks are achieved. One can think of Gremlin as a system that reacts to the user’s input. This means that when the user does something Gremlin will react as configured by the user. In a sense the following summarizes the way Gremlin operates:
How to think in Joystick Gremlin
When I press this button on my joystick, I want the following actions to be executed.
This is also reflected by the design of the UI which is divided into two halves. The left side lists all the physical inputs of a particular joystick, such as axes, buttons, and hats. The right side lists the actions associated with a particular physical input. Going back to the above idea the left hand side contains the “When I do” part while the right hand side reflects the “Gremlin does” part.
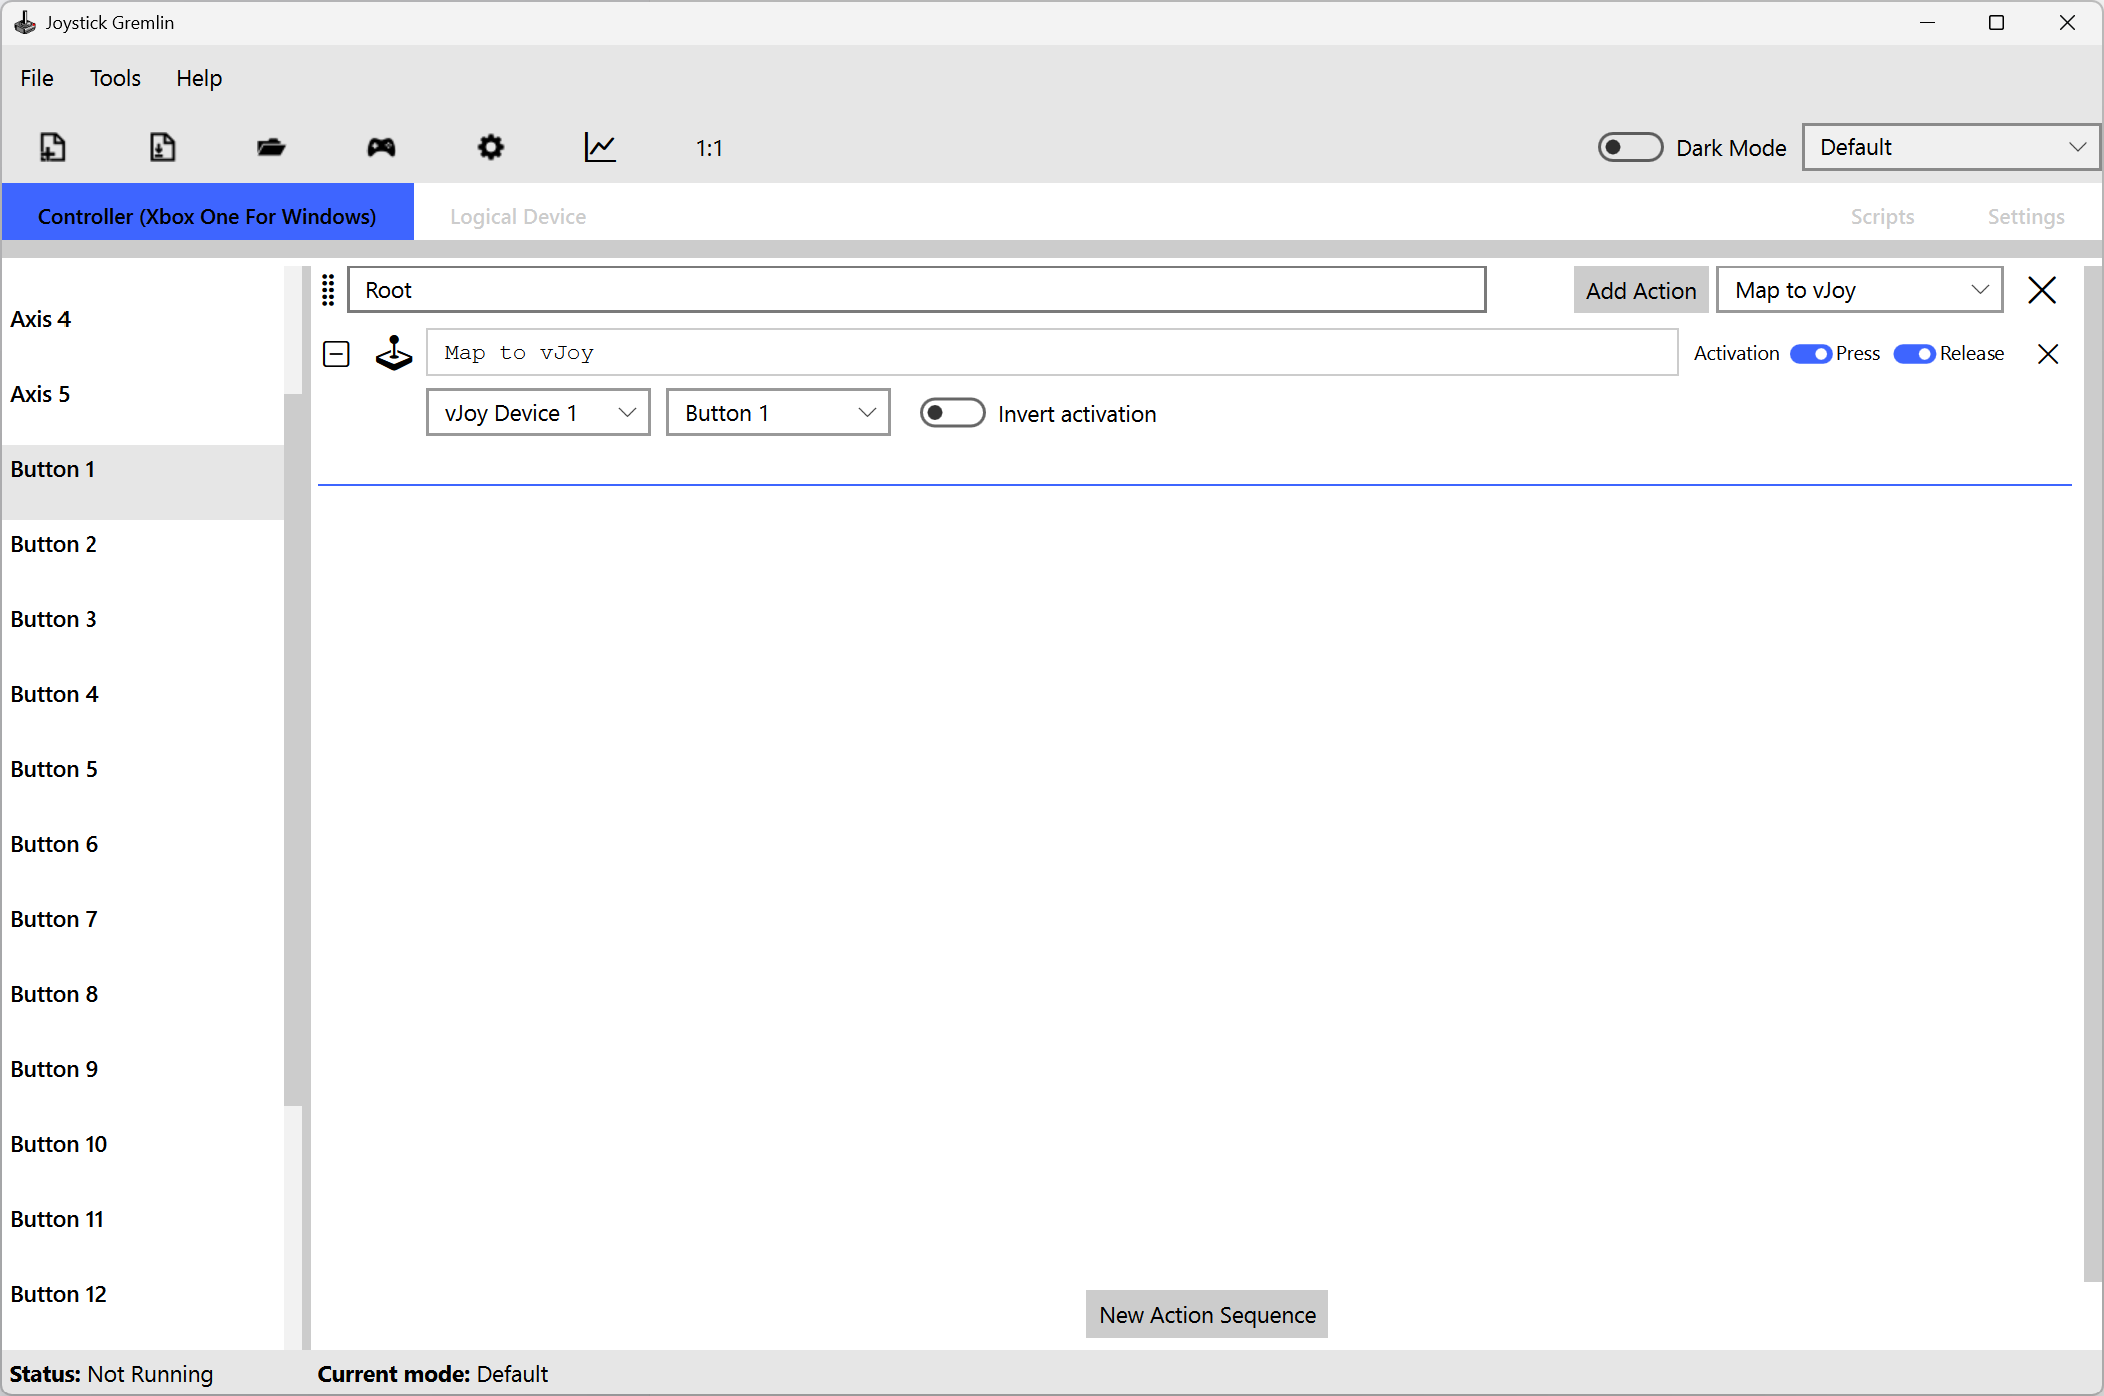
Joystick Gremlin UI
The next few sections describe in simple terms some of the functionality provided by Gremlin that is the most useful for a basic setup. A more complete description is provided in Interface. It is also worht getting familiar with the Concepts used in Gremlin and the terms, as they are used throughout this documentation.
Basic Mappings
The simplest type of mappings are remapping a physical input (joystick axis, button or hat) to a virtual one with the Map to vJoy action. The other basic action is to map a physical input to a keyboard key or combination of keys using the Map to Keyboard action. Both of these actions mirror the action of the physical input.
These actions allow merging of multiple physical devices into a single one which can be useful for games that only recognize a single joystick. Mapping joystick buttons to keyboard keys allows using the default bindings of a game without having to rebind everything or if a game doesn’t support joystick input.
Links
Macros
Sometimes it’s not enough to simply press and hold a button, for example when a sequence of keys needs to be pressed or an axis ramped up in a particular manner. This is where the Macro action comes into play. This action allows creating a sequence of events that should be played back when the action is activated.
Besides simply executing the macro once upon activation it is also possible to have a macro repeat in a variety of ways:
- Repeat a fixed number of times.
- Repeat until the actoin is activated again.
- Repeat as long as the physical input is pressed.
Links
Dealing with Axes
Axes often require additional configuration by adding deadzones to prevent accidental inputs or a response curves that modify the response to a physical input. This allows increasing or reducing the sensitivity of particular areas of physical input to tailor the axis to a user’s preference. The horizontal axis of the curve editor reflects the physical deflection of the axis from minimum (left) to maximum (right) while the vertical axis reflects to output generated for the corresponding physical input.
A response curve always needs to be combined with a mapping to an output device as otherwise the changes due to the response curve will not be seen anywhere.
Links
Condition
Sometimes it can be helpful to control the condition under which an action or container is executed. The execution can thus be conditioned on the state of other input devices such as joysticks or keyboard, as well as the state of the input associated with the action or container. This can be used to implement a shift state which normally executes one action but if a certain button is pressed a different action is executed.
Links
Modes
In certain situations it can be beneficial to split a profile into several parts, called modes. Each mode can have their own individual set of physical input to action mappings. For example in a flight simulator this could be used to have one mode for air combat, one for ground attack, and one for navigation.
A powerful feature of the modes is the ability to use inheritance. A mode (child) can inherit from a single parent which results in the child mode executing whatever action their parent defined for a given input, if the child has no actions of their own specified. This allows creating a basic mode and then fine tuning them in a child mode for particular usage scenarios without having to duplicate common actions.